Introduction
Create bouncy animals and foldable rainbows with just paper! These easy spring paper crafts are perfect for kids of all ages. With simple materials and step-by-step instructions, you can make all kinds of fun and interactive paper toys.
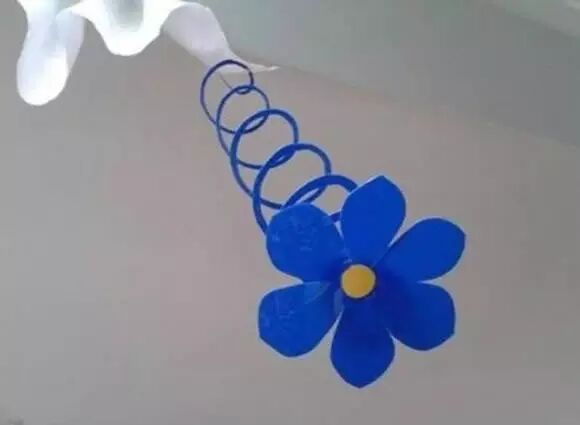
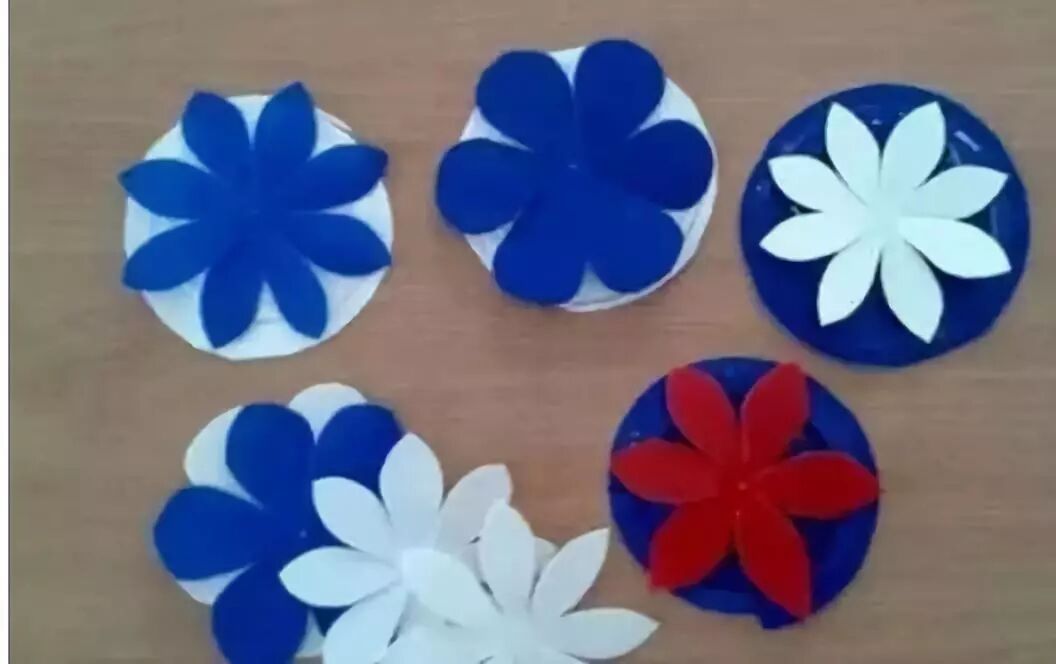
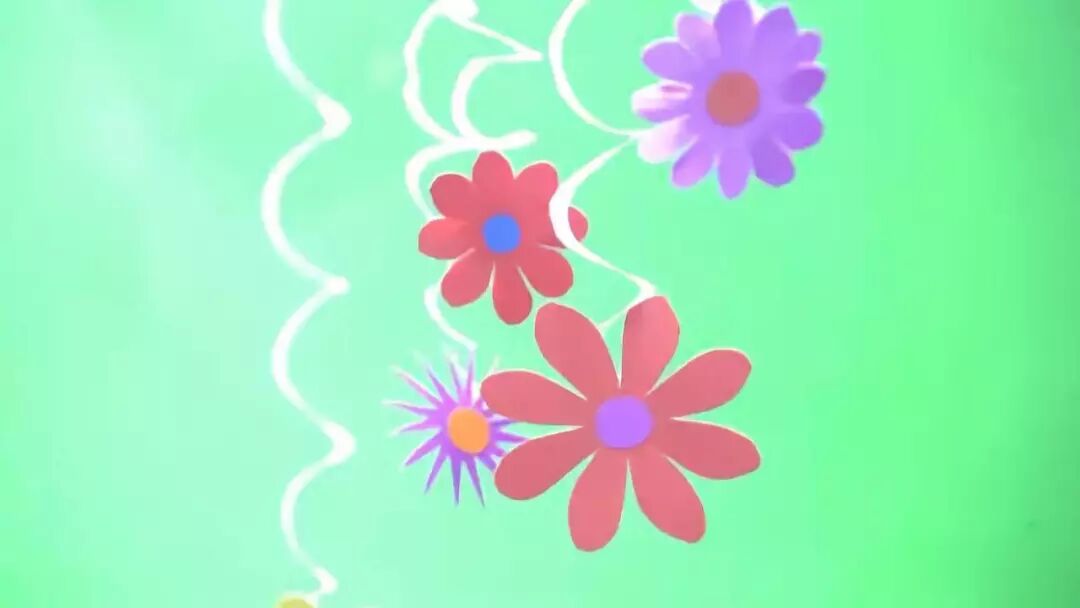
Spring Paper Flower 1
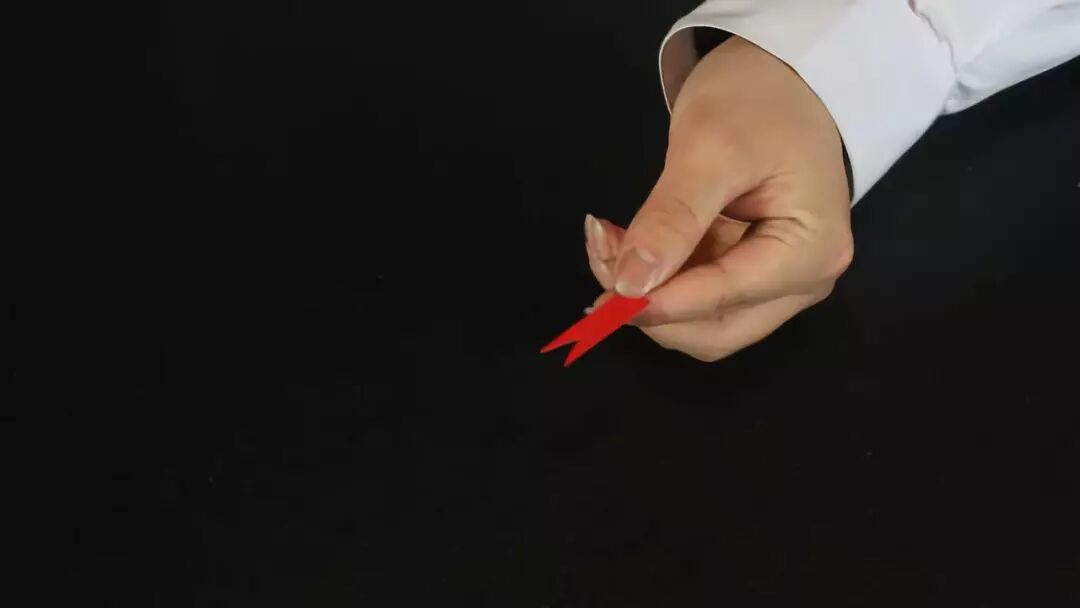
Can paper flowers bounce? Haha, just add a spring to them and they can!
Simple paper cutting craft: glue paper flowers and paper springs together to create a bouncing decoration that can jump in the air!
Step-by-Step Instructions
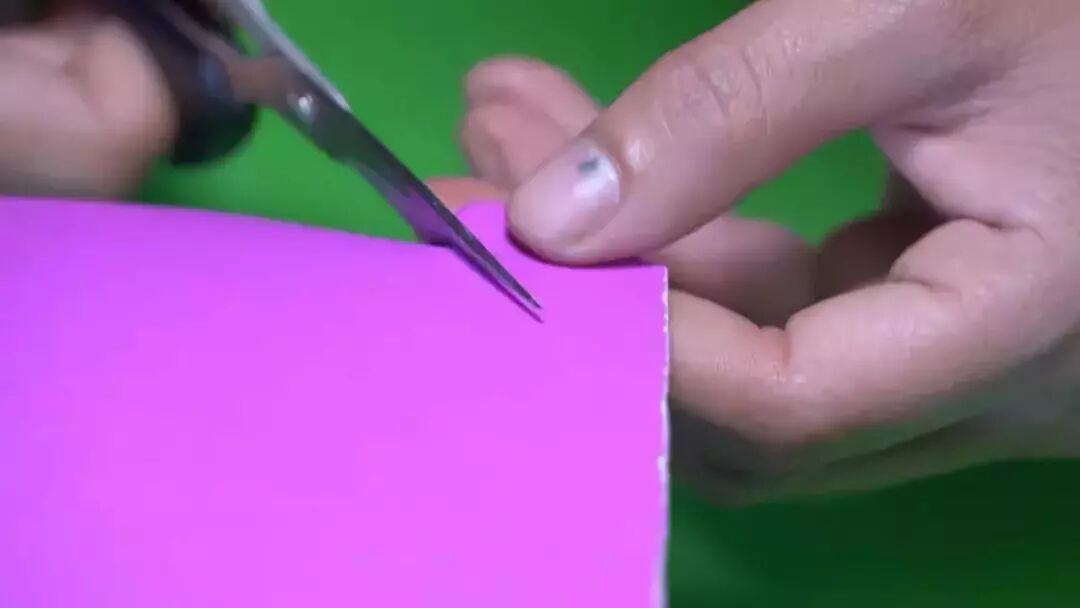
- Step 1: Cut flowers from colored cardboard.
- Step 2: You can choose any petal shape you like.
- Step 3: Cut a "mosquito coil" from cardboard - this is the spring!
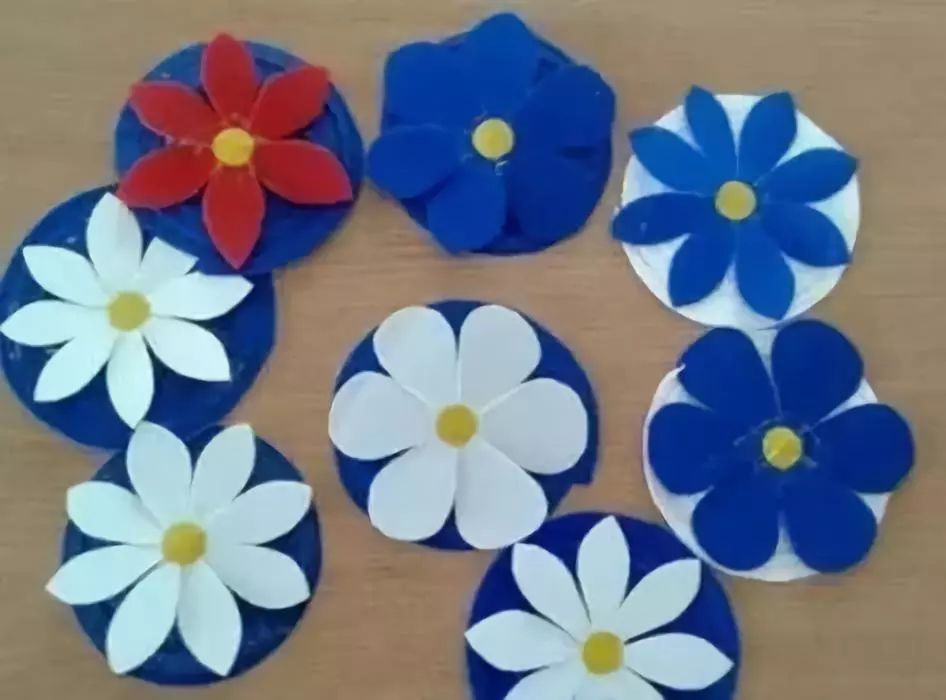
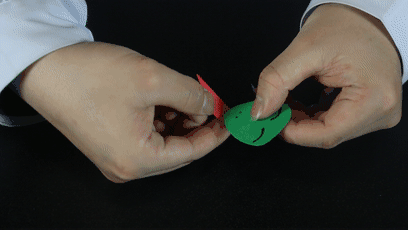
- Step 4: Glue the petals to the starting part of the spring's center.
- Step 5: Glue a yellow flower center in the middle of the petals.
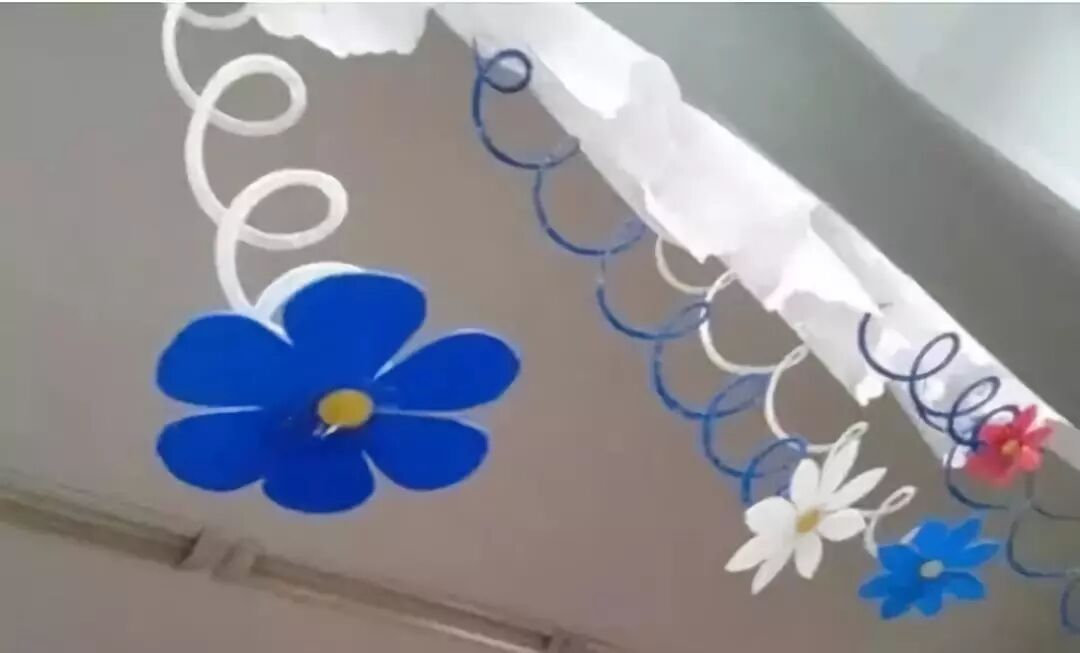
- Step 6: After the glue dries, you can hang the spring flower and it will bounce in the wind! O(∩_�?O haha!
Spring Paper Flower 2
Materials Needed
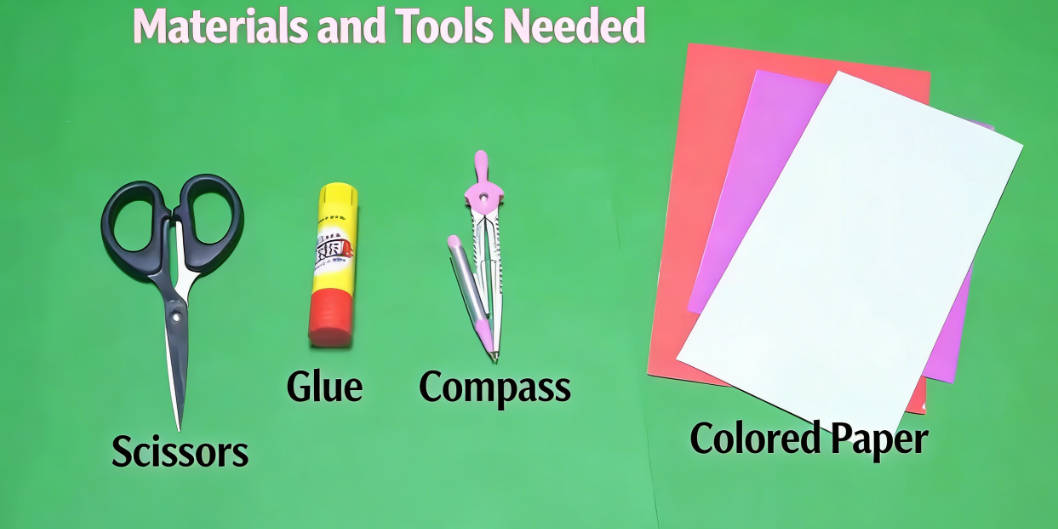
Scissors, glue, compass, various colored paper.
Tip: A compass can be replaced with circular objects like coins or bottle caps.
Step-by-Step Instructions
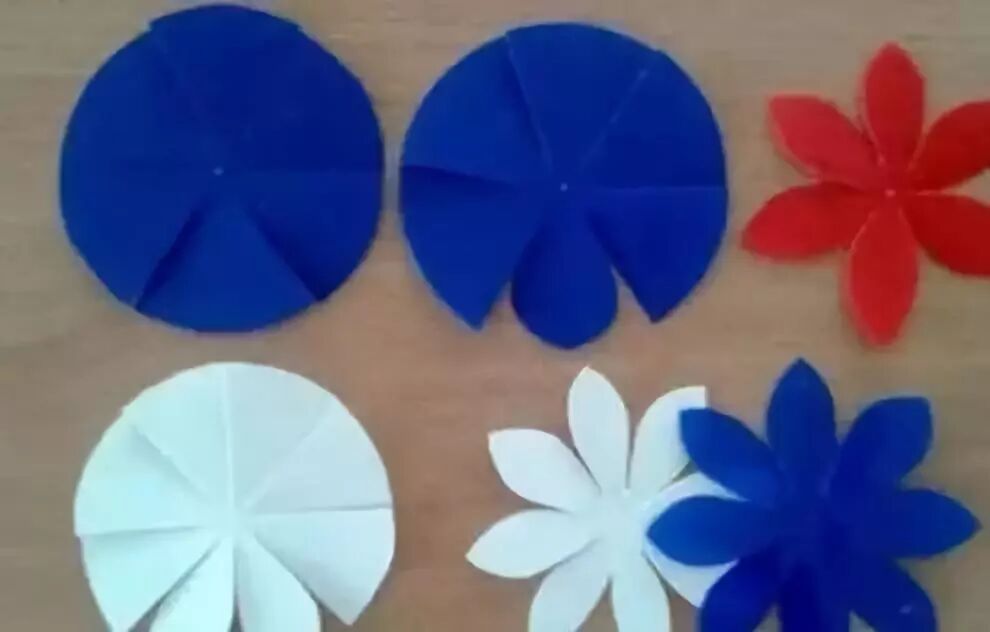
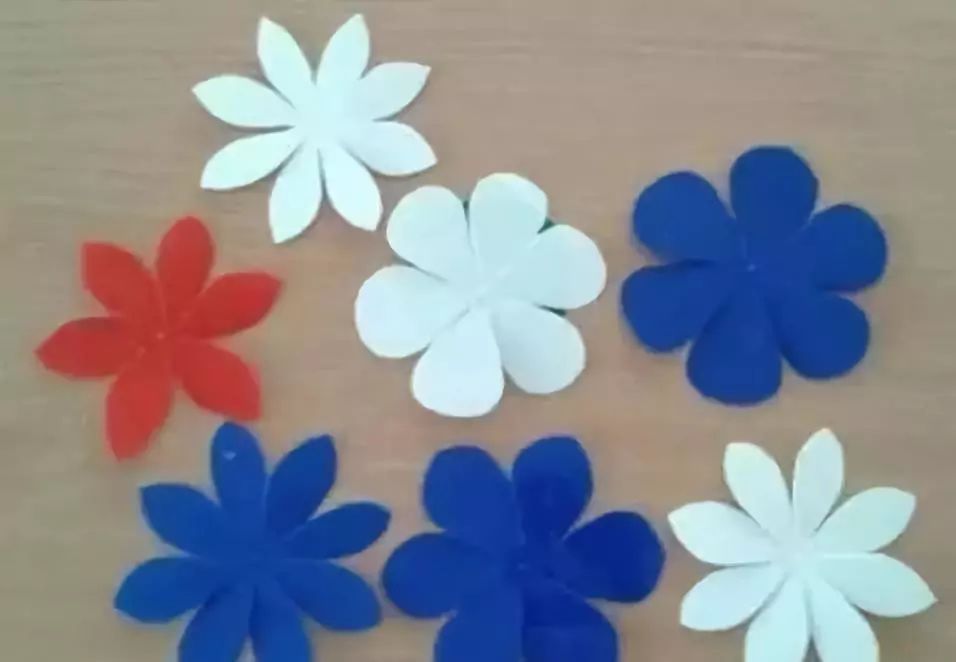
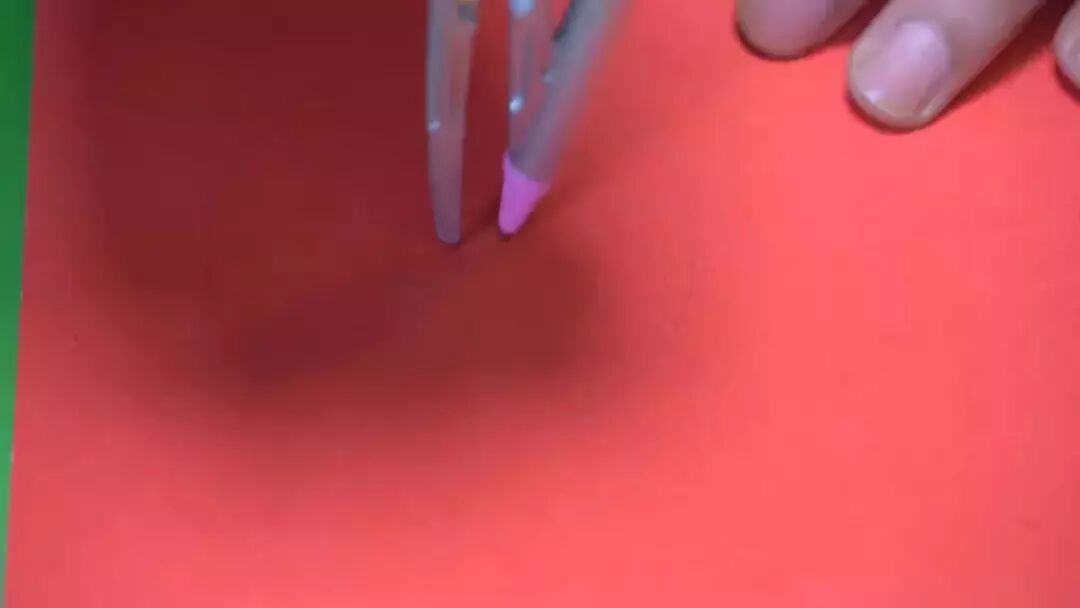
- Step 1: Use a compass to draw two circles, a small one for the flower center and a larger one for the petals.
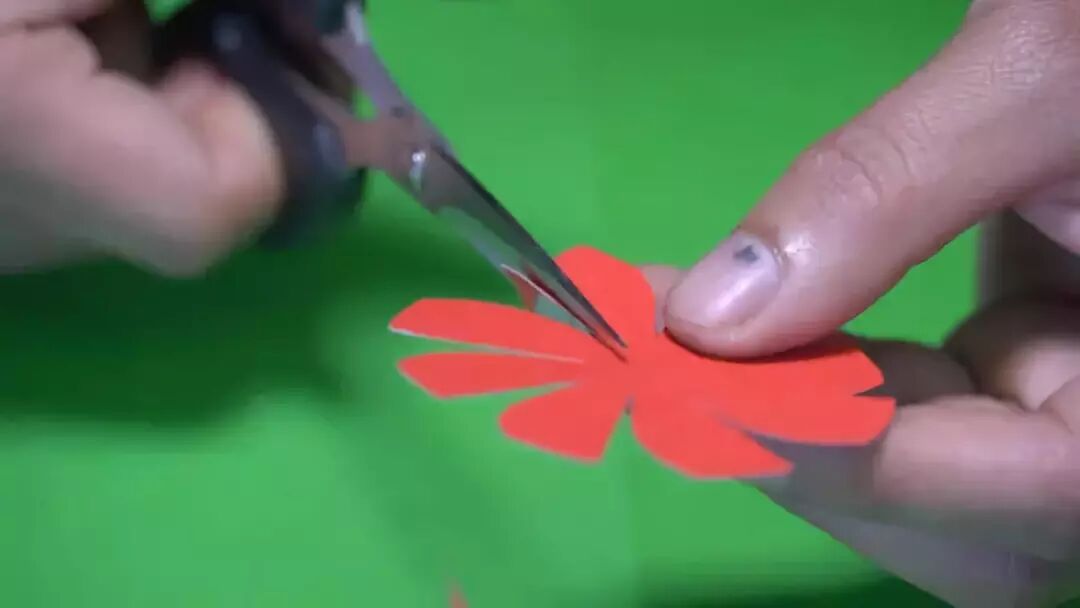
- Step 2: Cut petal shapes from the outer circle, being careful not to cut through the flower center.
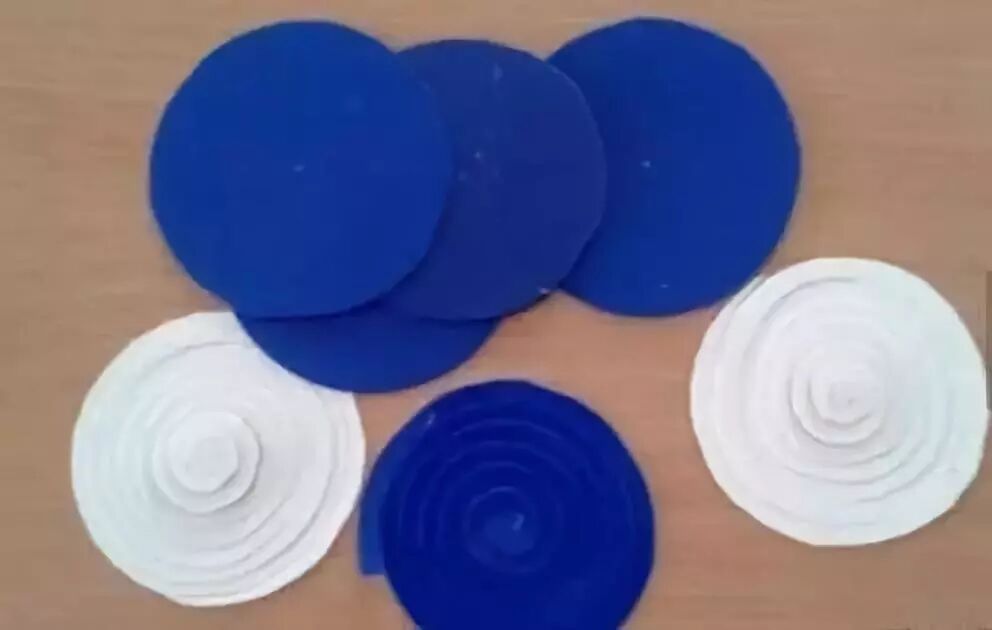
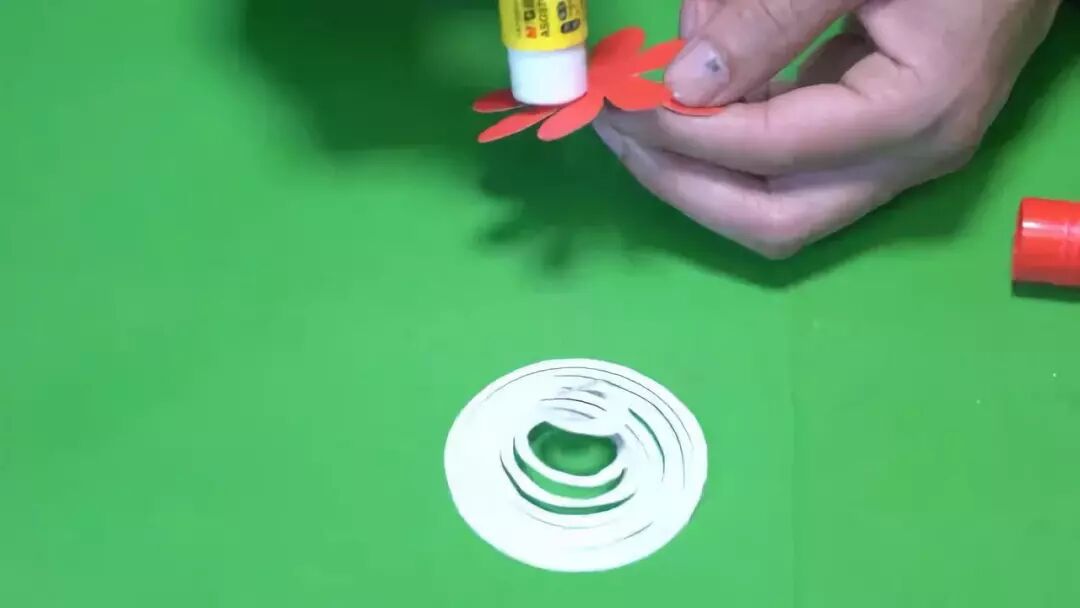
- Step 3: Cut white paper into multiple continuous rings as shown to make the elastic flower stem.
- Step 4: Cut small circular flower centers from different colored paper.
- Step 5: Glue the flower center in the middle of the petals, and the entire flower to the spring stem.
- Step 6: Look, the fun bouncing paper flower is ready! Isn't it simple? Try it with your kids now.
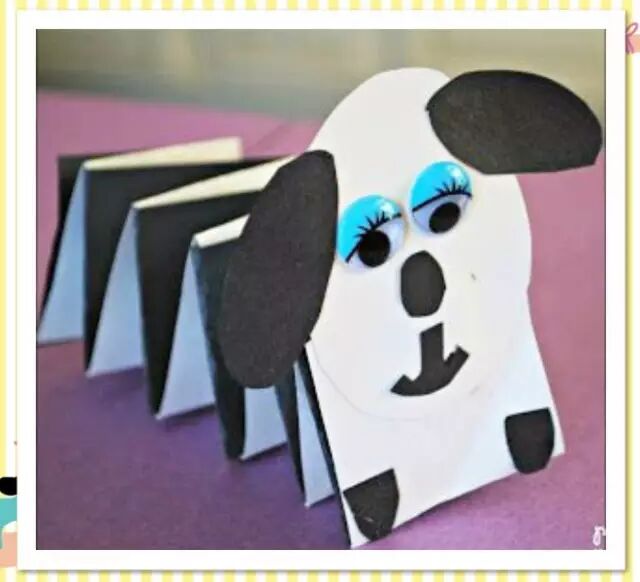
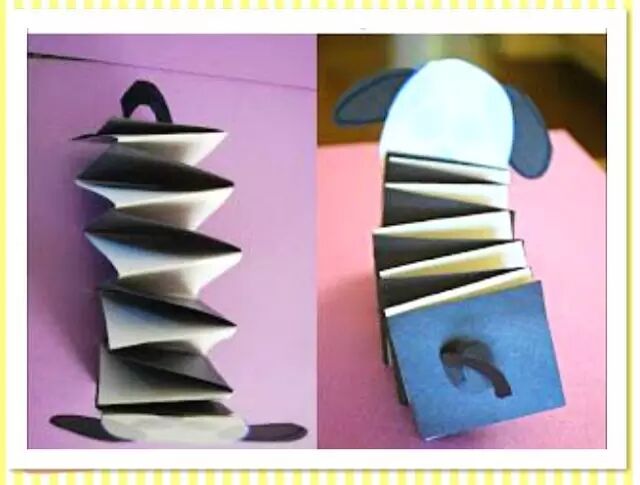
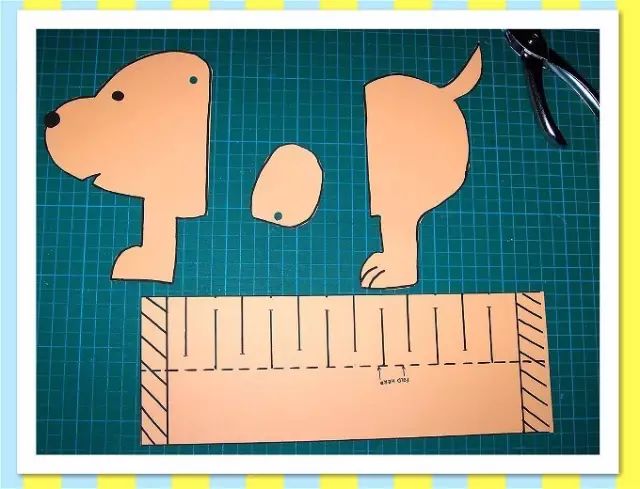
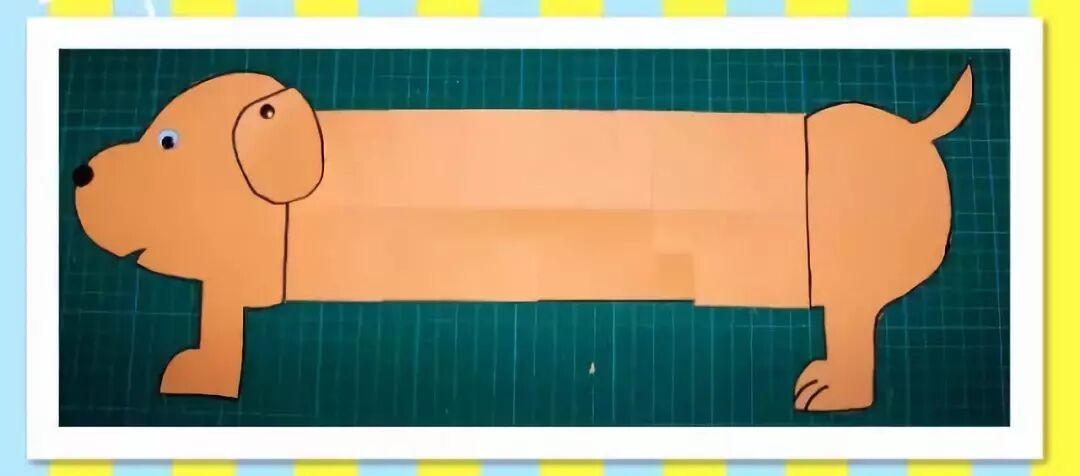
Spring Paper Dog
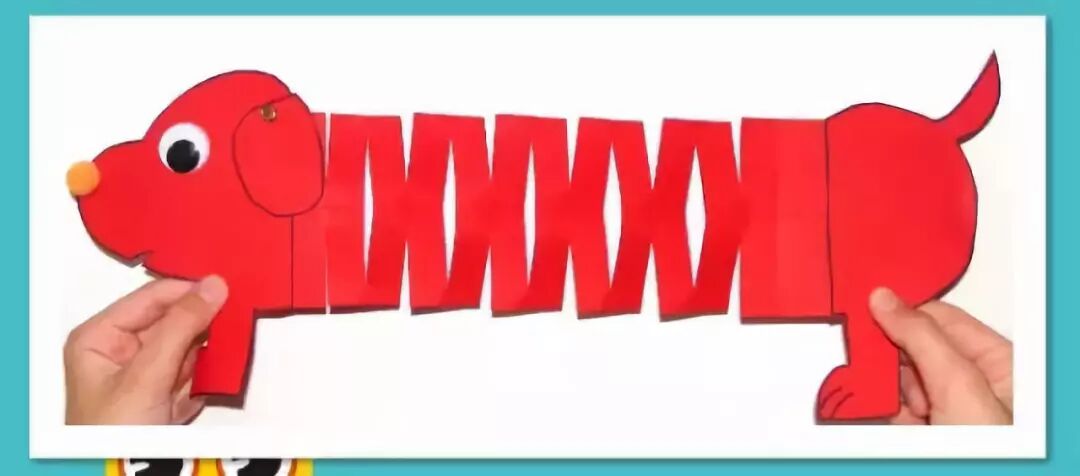
Make a spring origami from white cardboard, then color the concave sides black~
The dog even has a little tail, isn't it super cute~
And this stretchable dog is even cuter!
Ta-da~ Here comes the spring dog, super fun to bounce up and down~
Step-by-Step Instructions
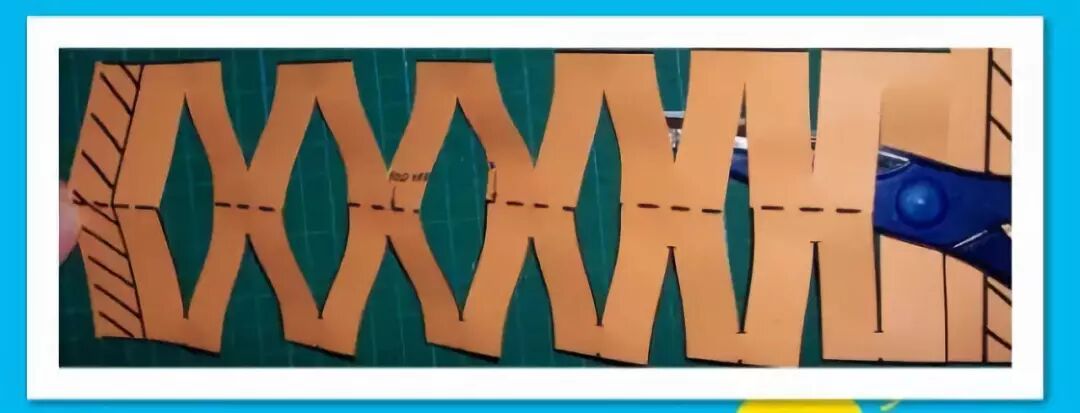
- Step 1: Prepare a piece of cardboard, draw the lines shown in the picture on one side - this is the key to making the spring!
- Step 2: Fold it in half, then cut along the lines shown in the picture~
- Step 3: Glue the various parts of the dog together~
- Step 4: Colorful cardboard makes the dog look even better~
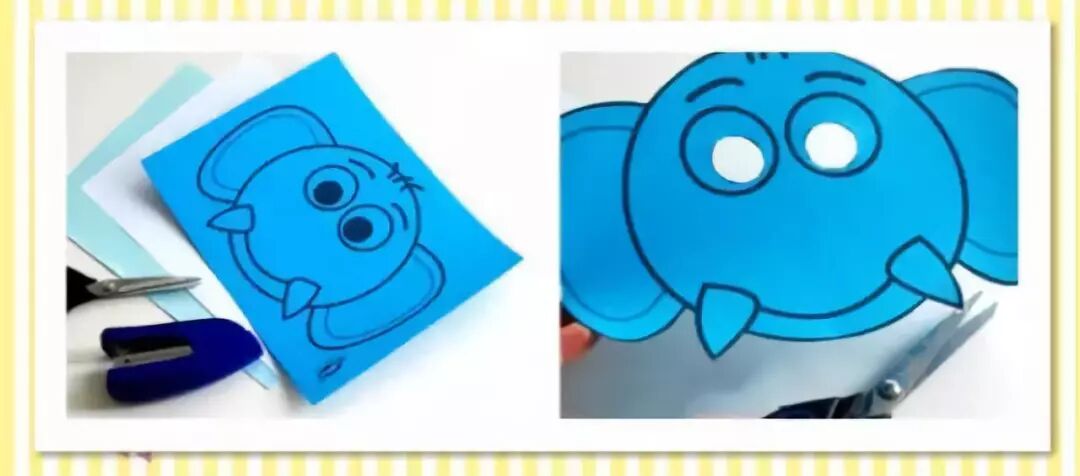
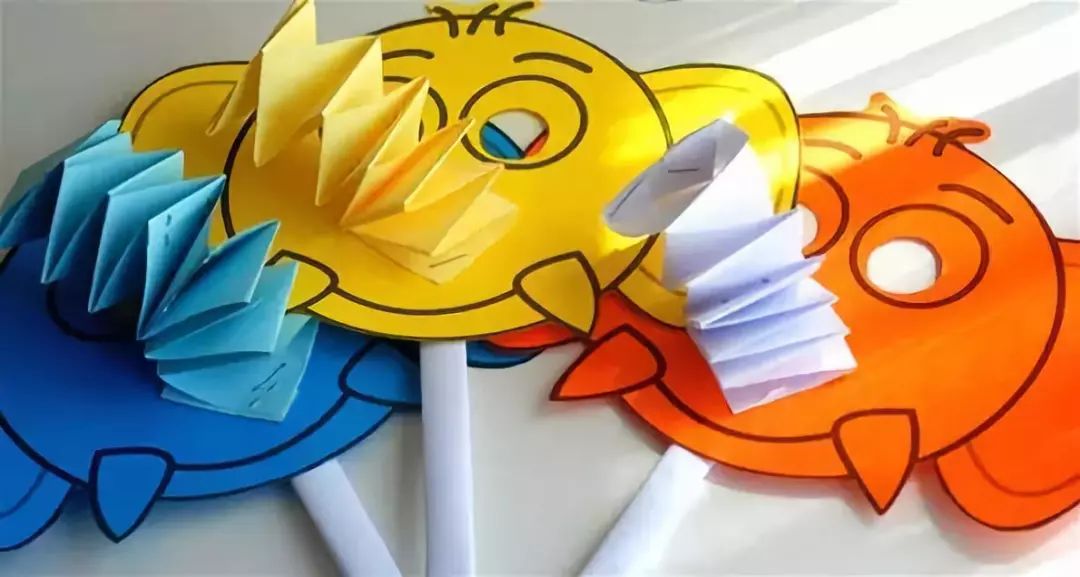
Spring Paper Elephant Mask

Be strong like an elephant and protect you!
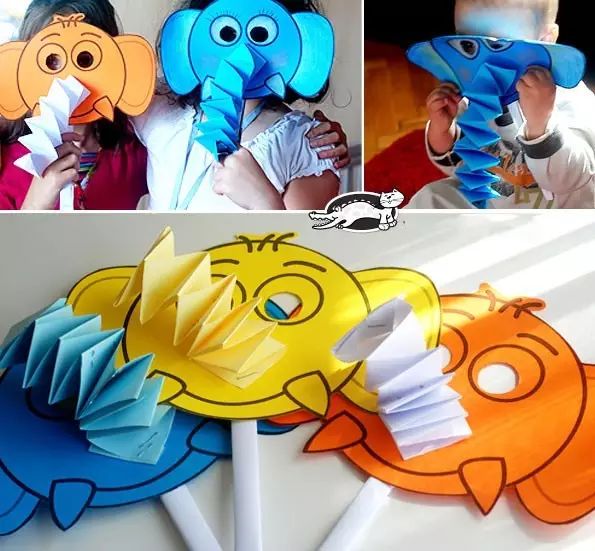
Mom, I will eat well and grow as strong as an elephant to protect you~
Step-by-Step Instructions
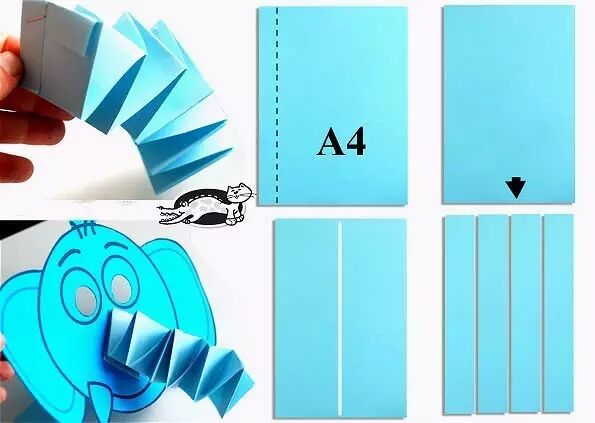
- Step 1: Draw the elephant's head on cardboard, mainly just drawing circles~
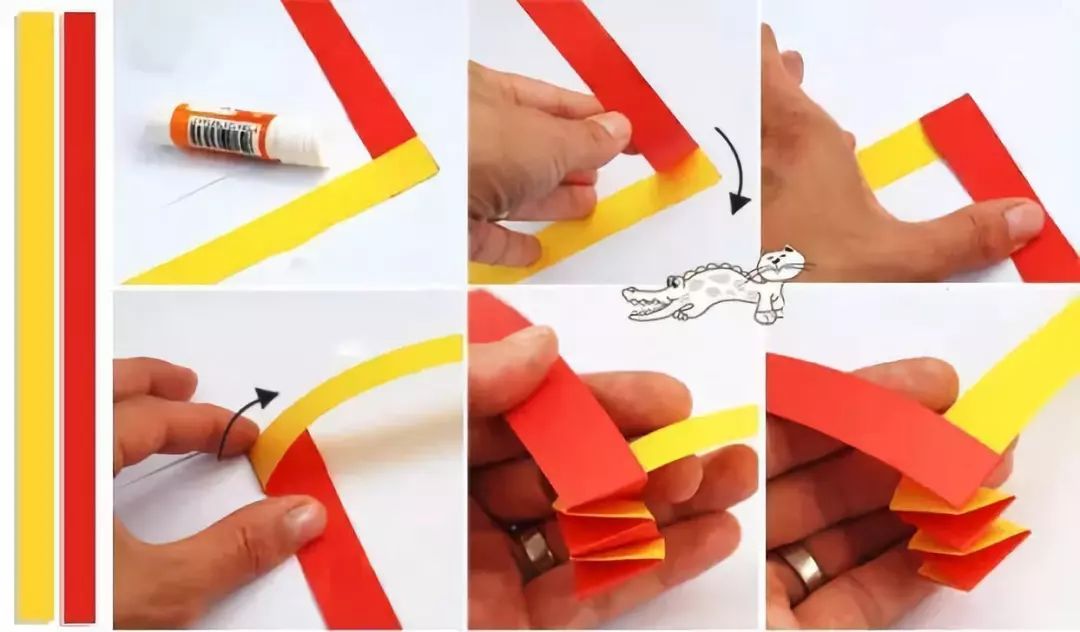
- Step 2: Prepare an A4 paper, cut it into strips of the same size~
- Step 3: Then fold two strips of cardboard together alternately. To make it clearer, we didn't use two blue cardboard~
- Step 4: Don't miss this fun elephant mask, hurry up and play with the kids~
Spring Paper Snake
Spring Paper Snake 1
Here comes the tongue-wagging snake! Just stick an oval cardboard in front of the spring origami~
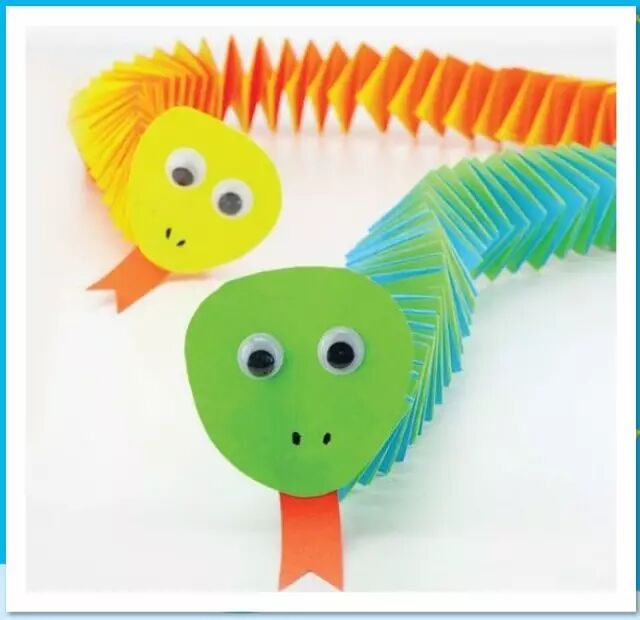
Spring Paper Snake 2
Same as the first one, just stick an oval cardboard in front of the spring origami~
Materials Needed
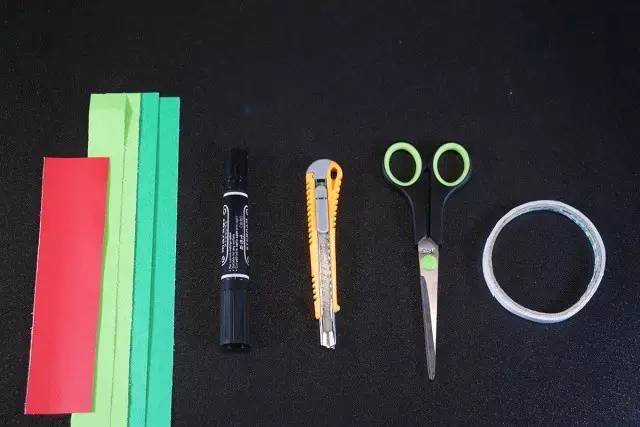
Paper strips, marker, knife, scissors, double-sided tape
Step-by-Step Instructions
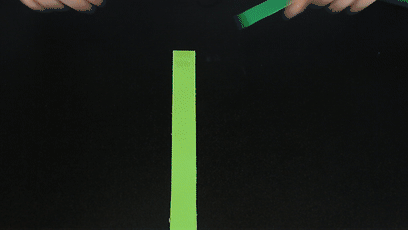
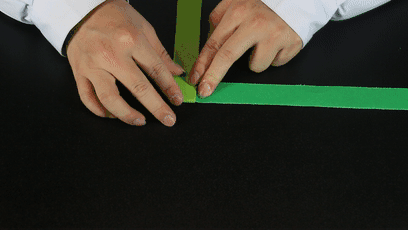
- Step 1: Attach double-sided tape to one end of the paper strip.
- Step 2: Fix the two strips at a right angle.
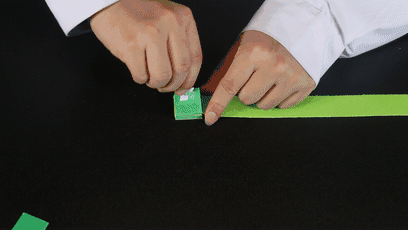
- Step 3: Fold the two strips back and forth in opposite directions.
- Step 4: What if the strips are not long enough? Don't worry, we can extend the strips with double-sided tape!
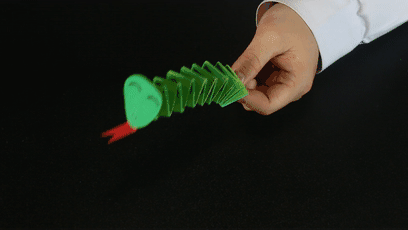
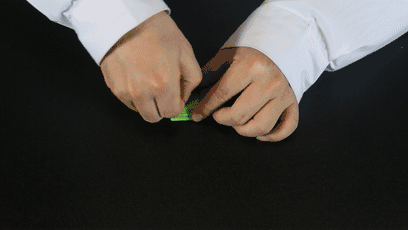
- Step 5: Continue folding until the end, then use double-sided tape to fix the snake's tail.
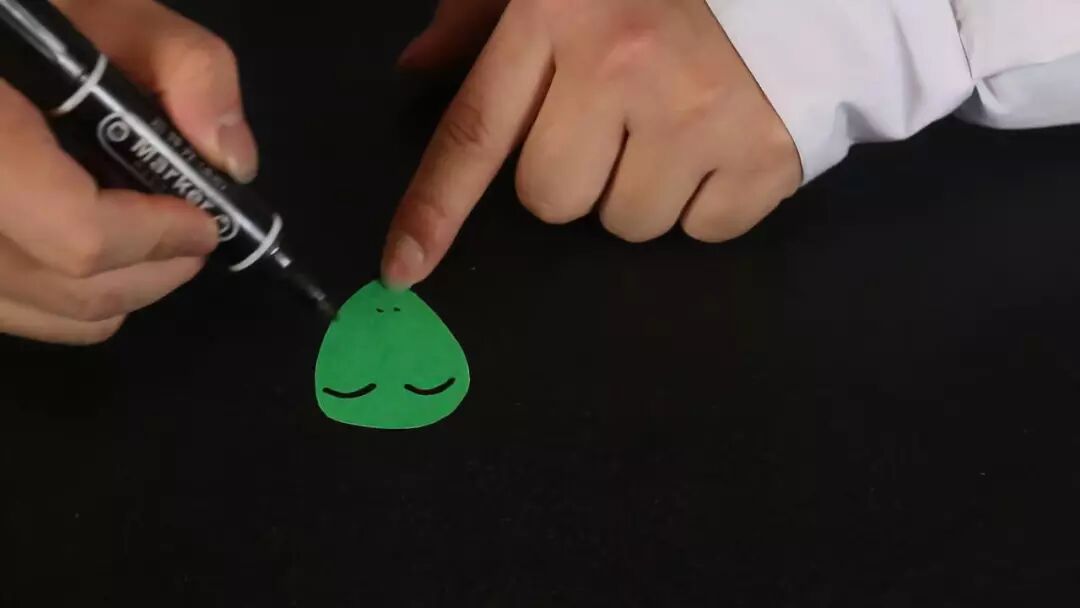
- Step 6: Draw the snake's head and tongue on cardboard, cut them out, then draw eyes and nostrils for the snake.
- Step 7: Glue the snake's head and tongue together, then attach them to the snake's body with double-sided tape.
- Step 8: Now a bouncy spring snake is complete! You can try putting it on the table, pressing it down, and releasing it to see how high your snake can jump!


Spring Paper Crocodile
Crocodile teeth and white eyes can be made with toothpaste! When making the crocodile, the spring origami should be folded longer~
Conclusion
These spring paper crafts are a wonderful way to engage children's creativity and fine motor skills. With just paper, scissors, and glue, you can create all kinds of fun and interactive toys that bounce, stretch, and delight. From flowers to animals to rainbows, the possibilities are endless. These projects are perfect for classroom activities, rainy day fun, or just spending quality time with your kids. So grab some paper and start crafting - you'll be amazed at what you and your children can create together!

3 Comments
David Miller
August 29, 2025 at 6:45 PM
I made the spring paper dog with my daughter, and it turned out adorable! We had so much fun folding the paper and watching it bounce. It's a great project for kids of all ages, and it's a wonderful way to keep them entertained. We're already planning to make the spring snake next!

Sophia Lee
August 29, 2025 at 1:30 PM
As a kindergarten teacher, I'm always looking for new craft ideas. These spring paper crafts are perfect! They're simple, use inexpensive materials, and the kids love them. The elephant mask was a big hit in our classroom, and the rainbow was perfect for teaching colors. Can't wait to try more of these ideas!


Emma Thompson
August 30, 2025 at 9:20 AM
These spring paper crafts are fantastic! I tried the bouncy flowers with my students, and they absolutely loved them. The step-by-step instructions were easy to follow, and the materials were simple to find. The kids were so excited to see their creations bounce. Thank you for sharing these wonderful ideas!